11/4/2025
By following these steps, you’ll not only own your crypto — you’ll control it securely, independently, and confidently.
So you’ve just bought your first hardware wallet — congratulations! You’ve taken the most important step toward real crypto security. But if you’re new, the setup process might feel intimidating. Don’t worry — this guide will walk you through every step, safely and clearly.
By the end, you’ll know exactly how to unbox, initialize, back up, and use your device to send and receive crypto securely.
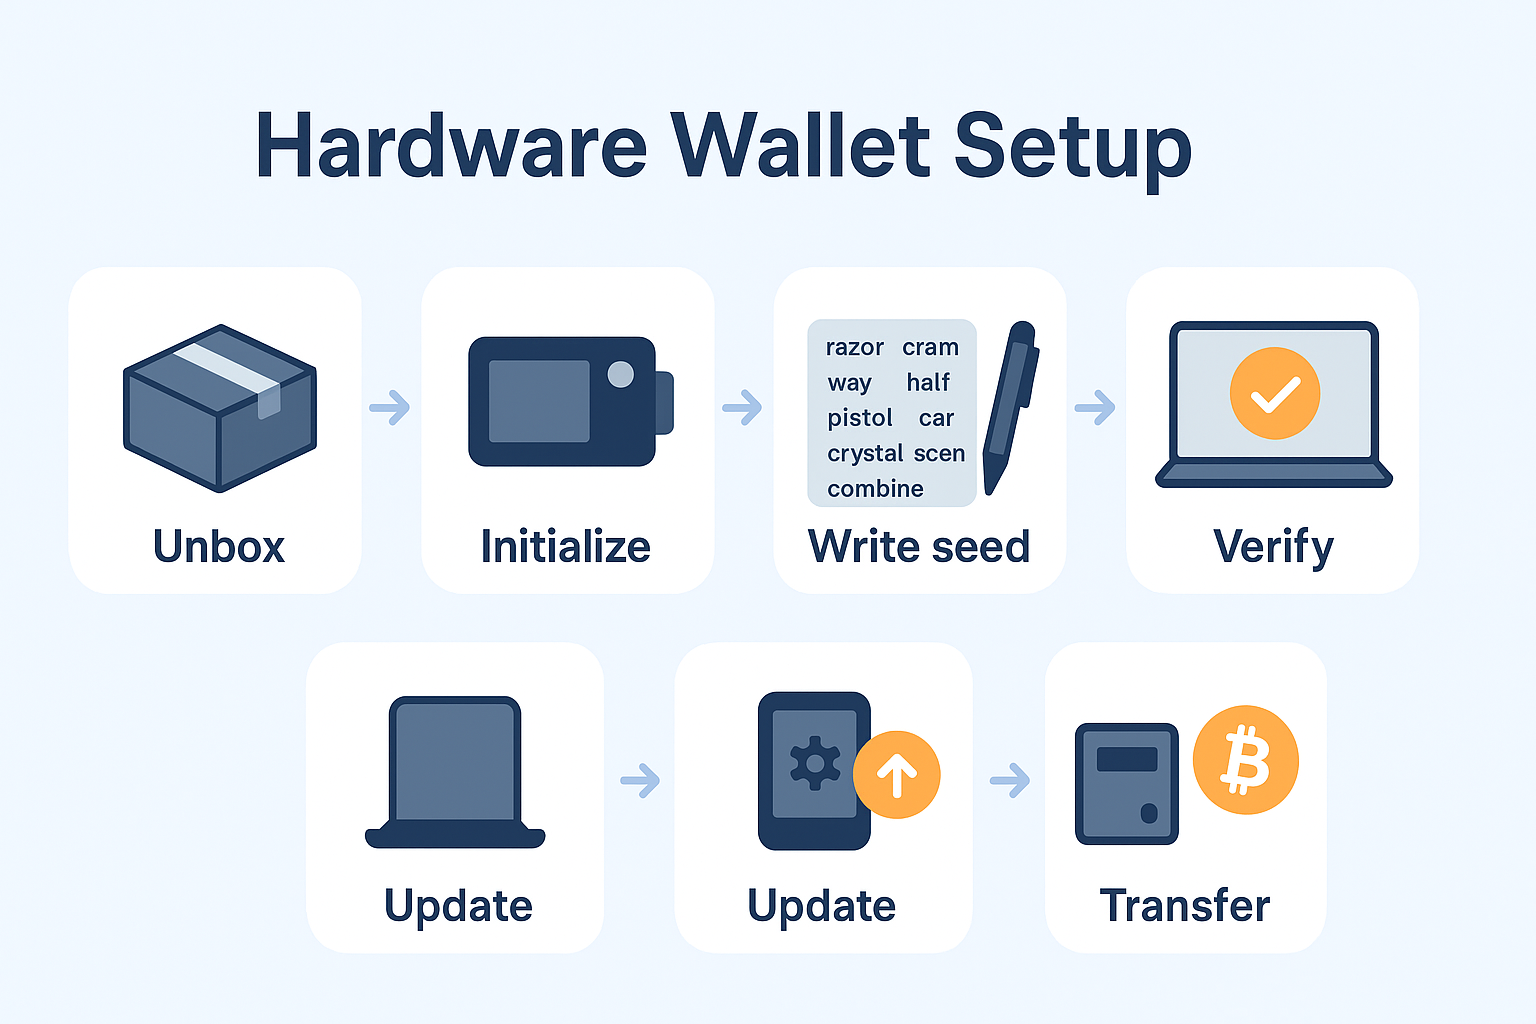
📦 Step 1: Unbox and Inspect Your Device
Before connecting anything, take a careful look at what you’ve received.
-
Check the packaging. Make sure it’s sealed, untampered, and matches the brand’s official design. Trusted manufacturers like Ledger, Trezor, Coldcard, and OneKey always use tamper-evident boxes or holographic seals.
-
Verify all contents. You should find the wallet device, a USB or connection cable, a recovery sheet (for writing your seed phrase), and sometimes a quick-start guide. If anything looks off or missing, contact the official support team before turning on the device.
-
Avoid secondhand or pre-initialized devices. Only use a wallet directly from the manufacturer or official reseller. If your wallet already has a recovery phrase printed or preloaded — stop using it immediately. It’s compromised.
🔌 Step 2: Connect and Initialize
Now, plug your hardware wallet into your computer or phone using the official cable. Follow the instructions on the screen or in the manufacturer’s app (for example, Ledger Live, Trezor Suite, or OneKey App).
-
Choose “Set up as new wallet.” Never select “Restore from existing recovery phrase” unless you’re deliberately recovering an old device.
-
Create a PIN code. This PIN protects your device if it’s lost or stolen. Choose a unique code and never share it with anyone.
-
Wait for the wallet to generate your seed phrase. This phrase — usually 12, 18, or 24 random words — is your backup key. It can restore your wallet if the device breaks, gets lost, or is reset.
📝 Step 3: Write Down Your Recovery Phrase
This is the most important part of the setup process.
When your wallet displays the 12 or 24 recovery words:
-
Write them down carefully on the provided recovery card or a metal backup plate (like Cryptosteel or Billfodl). Double-check the spelling and order.
-
Never take a photo or store it digitally. Do not screenshot it, save it in Notes, or upload it to the cloud. Any online storage instantly defeats the purpose of a cold wallet.
-
Keep multiple backups if possible. You can store one copy in a secure home safe and another in a separate, trusted location. Just make sure both are offline and physically secure.
🔁 Step 4: Verify Your Recovery Phrase
Most hardware wallets will ask you to re-enter the recovery words in the correct order to confirm accuracy. This step is crucial — it ensures that your written copy is correct before you ever store real funds.
Take your time here. If even a single word is out of order, your backup won’t work during recovery.
Once verified, you can rest easy knowing that your wallet and seed are securely backed up.
⚙️ Step 5: Check for Firmware Updates (Optional but Important)
After setup, your device might suggest a firmware update. Before updating:
-
Verify the update source. Only download updates directly from the manufacturer’s official app or website — never from links shared on social media or email.
-
Confirm the firmware signature. The wallet should verify that the update is digitally signed by the manufacturer. If the device displays a warning about an invalid signature, stop immediately and contact support.
-
Perform the update only after backing up your seed phrase. Never update before confirming your backup is complete and correct.
Updating firmware is safe when done correctly — it improves security and fixes bugs — but always treat it with the same caution as managing your private keys.
💸 Step 6: Do a Small Test Transaction
Now that your wallet is ready, it’s time for a test.
-
Receive a small amount of crypto. Use your wallet app to generate a receiving address. Send a tiny amount (for example, $5–10) from another wallet or exchange. Check that it arrives correctly.
-
Send it back out. Create a small outgoing transaction to make sure you understand the process of signing and confirming. You’ll see that your wallet requires physical confirmation before it signs — this is the air-gapped protection in action.
-
Review the workflow. After one or two test runs, you’ll feel comfortable handling real assets securely.
💡 Pro Tips for Maximum Security
-
Write your recovery phrase only on offline materials. Paper or metal backups only — never digital copies.
-
Avoid public Wi-Fi or shared computers. Always set up your wallet in a private, trusted environment.
-
Label and organize your backups. Mark each metal plate or recovery card discreetly (but without exposing the seed words).
-
Use a tamper-proof bag or safe. Treat your seed phrase like a stack of gold — because, in crypto terms, it is.
⚠️ Common Mistakes to Avoid
Many first-time users make the same errors. Avoid these from day one:
-
Upgrading firmware before verifying your backup. If something goes wrong during the update, you could lose everything without a working recovery phrase.
-
Entering your seed phrase on a computer. The recovery process must always happen on the hardware wallet itself, never on a connected device.
-
Assuming that “it looks new” means it’s safe. Counterfeit or tampered wallets can look identical to official ones — always verify authenticity using the official app.
-
Setting up under surveillance. Never perform your setup in a public space or on a network you don’t control.
✅ Key Takeaways
- Only buy hardware wallets from official sources.
- Always choose “Create new wallet” — never use a preloaded seed phrase.
- Write your seed phrase offline and store it securely.
- Verify your backup before doing anything else.
- Use firmware updates safely — only from trusted, signed sources.
- Practice with small test transactions before storing large amounts.
By following these steps, you’ll not only own your crypto — you’ll control it securely, independently, and confidently.